
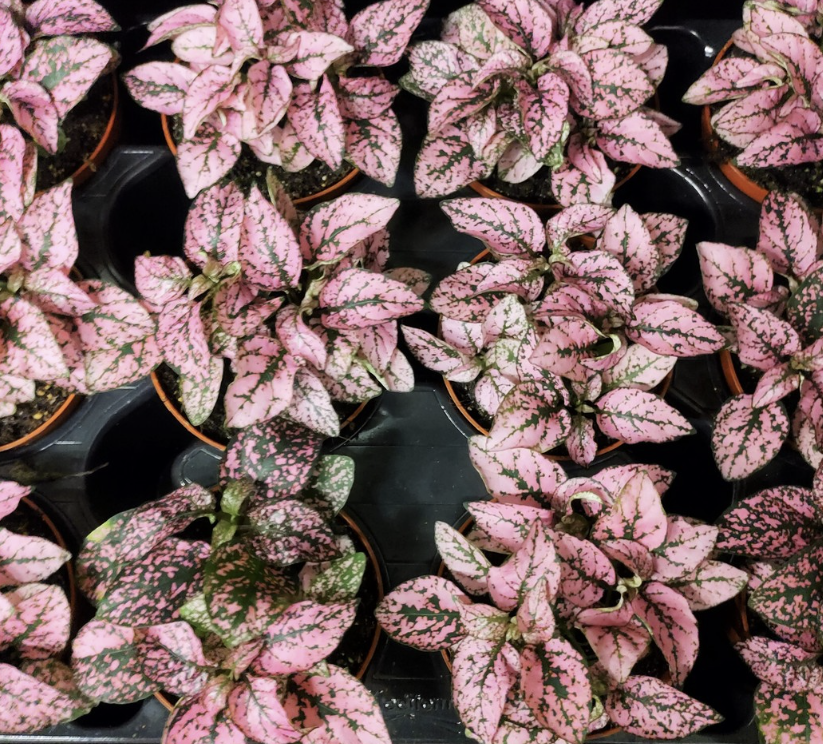
The Polka Dot Plant, also known as Hypoestes phyllostachya or the Freckle Face Plant, is one of the easiest and most rewarding houseplants to propagate.
This beautiful plant, native to South Africa and Southeast Asia, is cherished for its vibrant pink leaves, green speckles, and ability to thrive in a variety of indoor settings.
Whether you’re looking to expand your houseplant collection or share new plant babies with friends, this guide will walk you through the best methods for polka dot plant propagation, as well as some essential growing tips for keeping them healthy.
For other tips on plant care, check out my plant care section.
Basic Care for Polka Dot Plants
Before we dive into propagation, let’s review some quick tips for proper care of your Polka Dot Plant:
- Light: They thrive in bright indirect light but can tolerate lower light conditions. Avoid full sun, as it can scorch the delicate pink leaves. A bright window or partial shade works best.
- Soil: Use a well-draining potting mix with plenty of organic matter to prevent root rot.
- Water: Keep the soil moisture consistent, but avoid excess water. These plants love moist soil, but soggy roots can lead to problems.
- Temperature & Humidity: Being a tropical plant, they prefer warm temperatures (above 60°F) and high humidity. A humid environment or a mini greenhouse can boost their growth.
- Pruning: Trim leggy growth to encourage bushier growth and remove any yellowing or green leaves that detract from their colorful display.
The Best Methods for Polka Dot Plant Propagation
1. Stem Cuttings (Preferred Method)
Propagating through stem cuttings is the easiest way to get new plants and is considered the go-to method for most plant lovers. Follow these simple steps:
- Step 1: Choose the Right Cuttings
- Look for a healthy stem with at least one leaf node and new growth.
- Using clean scissors or pruning shears, cut a 4-6 inch section of the stem just below a leaf node.
- Remove the lower leaves, leaving just the top 2-3 leaves.
- Step 2: Water Propagation (A Fun and Popular Choice on TikTok)
- Place the cutting in a glass of water, ensuring the leaf node is submerged.
- Put the glass in a bright spot with indirect sunlight (a bright window is ideal).
- Change the water every few days to keep it fresh and prevent root rot.
- In a couple of weeks, you should see new roots forming. Once there’s a good amount of roots (about 1-2 inches long), transfer the cutting to moist soil in a small pot.
- Step 3: Soil Propagation (For Direct Planting)
- Dip the cut end into rooting hormone (optional but helps with healthy root development).
- Plant the cutting into a potting mix that retains moisture but provides good drainage (pots with drainage holes are essential).
- Keep the soil moist but not waterlogged, and cover the pot with a clear plastic bag to create a humid environment (mini greenhouse effect).
- Place in bright indirect light and wait for new roots to develop, which should take a few weeks.
2. Seed Propagation
Although less common, growing Polka Dot Plants from seeds is another method for propagation. This is ideal if you want a larger number of plants or enjoy the challenge of starting from scratch.
- Step 1: Gather Seeds
- If your Polka Dot Plant produces pink flowers in the late summer, allow them to mature and collect the seeds.
- Step 2: Plant the Seeds
- Use a light peat moss and potting mix blend.
- Sprinkle the seeds on the surface and cover them lightly with soil.
- Keep the soil evenly moist and place the container in a humid environment with bright indirect light.
- Step 3: Wait for Germination
- Seeds will germinate in a couple of weeks under the right conditions. Once the first set of true leaves appears, carefully transplant seedlings into small pots.
3. Division
For mature plants with multiple stems, you can divide the root ball to create new plants. This is the best way to propagate when repotting a plant that has outgrown its container.
- Carefully remove the plant from its pot and gently separate the roots into smaller sections, ensuring each has a healthy stem and roots.
- Replant each section into small pots with fresh potting mix and water thoroughly.
Preventing Common Issues During Propagation
- Root Rot: Ensure your pots have good drainage and avoid overwatering.
- Powdery Mildew: Maintain proper airflow and avoid letting leaves stay wet for too long.
- Leggy Growth: Place your propagations in bright indirect light to encourage compact growth.
- Spider Mites: Check the underside of leaves regularly, as these pests can thrive in humid conditions.
Best Time for Polka Dot Plant Propagation
The warm growing season (spring and summer) is the best time to propagate Polka Dot Plants. During these months, the plant’s natural growth is at its peak, and you’ll see faster root growth and new plant babies.
Final Tips for Success
- Always use clean scissors to make clean cuts, reducing the risk of infection.
- Monitor soil moisture levels carefully to avoid drying out or overwatering your propagations.
- Provide a humid environment to support healthy root development. If your home is dry, consider using a mini greenhouse or misting the plants regularly.
- Place propagations in a bright spot with indirect sunlight for the best results.
- Once established, repot your plants into containers with drainage holes to ensure good drainage and prevent issues like root rot.
Why Propagate Polka Dot Plants?
Not only is it a fun and easy way to grow new plants, but it also helps rejuvenate your Polka Dot Plant by encouraging bushier growth. Plus, these cheerful plants make great home decor additions and thoughtful gifts for fellow houseplant enthusiasts.
Ready to start your polka dot plant propagation process? Grab your clean scissors, pick a preferred method, and watch as your new home fills with vibrant pink leaves and new plant babies in no time!
Frequently Asked Questions
1. Can I propagate Polka Dot Plants during the winter?While Polka Dot Plants can be propagated in the cooler months, the best time for propagation is during the warm growing season (spring and summer) when plants are actively growing. If propagating in winter, provide extra warmth and a humid environment to encourage root growth.
2. How long does it take for Polka Dot Plant cuttings to root?It usually takes a couple of weeks for roots to form when using the water propagation method. If propagating in soil, it may take slightly longer. Ensure the cuttings are kept in optimal conditions, such as bright indirect light and consistent moisture.
3. Why are my Polka Dot Plant cuttings not rooting?Common reasons include insufficient light, overly dry or soggy conditions, or not using a leaf node in the cutting. Ensure you’re using healthy cuttings, keeping the environment humid, and providing enough light.
4. Do I need to use rooting hormone for propagation?While not necessary, rooting hormone can speed up the process and encourage healthy root development. It’s particularly useful if you’ve had trouble getting cuttings to root in the past.
5. How do I prevent leggy growth in my Polka Dot Plants?Leggy growth occurs when the plant doesn’t get much light. To prevent this, place your Polka Dot Plant in a bright spot with indirect sunlight and regularly pinch back stems to encourage bushier growth.